ArchivistaERP 2016/X simplifies billing processes
Egg, Switzerland, 18 October 2016: In a web-based application (like ArchivistaERP), documents are usually generated in PDF format, and these can be printed via the browser or sent via email. This procedure has the advantage that the web application does not have to be set up specifically for printing and/or emailing. However, a disadvantage is that the processes are dependent on the client installation. A new feature in ArchivistaERP 2016/X is that the printing processes can be defined on the server. Furthermore, the direct sending of emails from ArchivistaERP 2016/X has been simplified considerably compared to earlier versions.

Server-side printing
Two steps are required in order to print documents directly from the ArchivistaERP server. Firstly, the printers on the ArchivistaBox must be set up with CUPS. Secondly, the desired reports must be assigned to the printers or users.
Setting up the printer in CUPS
First, CUPS i.e. the print server, must be activated on the ArchivistaBox. This can be done via WebConfig or the Archivista Desktop. More information is available in the ArchivistaBox manual. After activating the print server, the printers on the local ArchivistaBox have to be set up in the local web browser with ‘http://localhost:631’.
Assigning reports to the printers and (optionally) to users
In the simplest case, all the reports are assigned to a single printer. To do this, open an entry under ‘Settings’ and ‘Printer’. In order to assign all the reports to one printer, specify the printer (for example, -P oki) in ‘Commands’, and enter an asterisk (*) for the reports. This will result in all the reports being sent to the printer ‘oki’.
More complex cases involve certain users having personal printers or certain reports needing to be accessed using a specific tray and/or other options. For example, in order to print the usual Swiss paying in slips without having to manually insert the document, the forms (which are available free of charge at the post office) are accessed via a printer tray.
Ideally, a second printer is usually opened in CUPS, in which the desired tray is preset. Specifically, it involves the form ‘111’ and an alternative printer/tray is accessed with ‘-P esr’. Similarly, different printers can be set for specific users.
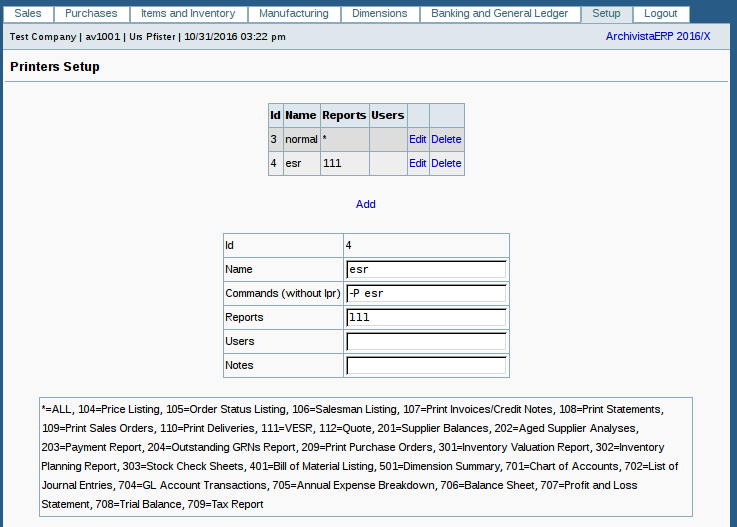
As soon as reports are assigned to the printers, a PDF link appears in the mask, next to the commands for printing. Clicking on the previous link (for example, Print) results in the document being printed straight away; clicking on ‘PDF’ results in, as previously, the document being made available for download/viewing as a PDF file in the web browser.
Note: Server-side printing is not available in ArchivistaCloud because the CUPS printers cannot be activated and it makes no sense to make a cloud printer local again.
Convenient sending of mails
SMTP sending of mails was already possible, but this had to be called up via the reports (‘Mail to customer = Yes’ option there).
Activating mail delivery
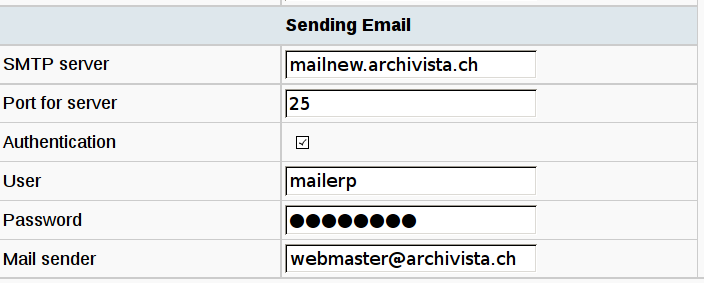
First, a look at the settings for the ‘Preferences’ that allow the sending of emails. The mail server, the port and the login information must be specified so that emails can be sent.
Defining email addresses at the customer or department
In order to, for example, be able to send an order and/or an invoice directly to a customer, an email address must be stored for either the respective customer or department. If this is not the case, emails cannot be sent, i.e. the ‘Mail’ link does not even appear.
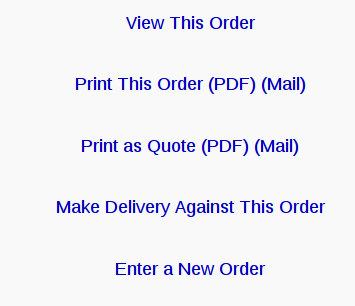
If mail sending has been activated and the customer’s email address has been defined, the ‘Mail’ link appears in the forms. A click on this sends the email.
Note: The sending of the email is final and cannot be reversed. In the ‘branches’ for customers, the server-based printing process can be suppressed using the ‘Send documents via email’ field. This provides an indication that the customer would prefer to receive documents by email.
PDF link for checking
In order to neither print documents straight away or send them by email, the PDF link can be selected at any time. The document is then downloaded and/or displayed in the browser. In order to provide a convenient check of the documents that are generated, the document is also always sent to the web browser during direct printing and/or emailing. This is done to provide confirmation that the operation has been completed, and also to provide a convenient check regarding whether the data is correct.
Note: Before direct email delivery is carried out, it is recommended to use the PDF link to check whether the invoice is correct. This is why the PDF link is always displayed in front of the mail link.
Closing comments
The new features considerably simplify the creation and sending of documents to customers. Additions are at the most conceivable with regard to mass printing (this feature has always existed in the reports). Users are very welcome to contribute relevant guidance in this regard. The above functions require ArchivistaERP 2016/X from today’s date. The new features are of course also available in ArchivistaCloud (with the exception of server-side printing).

