25.2.3 Set larger font
For large screens (4K or higher resolution), the font size on the ArchivistaBox desktop may be too small. However, you can enable a larger font for the desktop. To do this, select the 'Control Center' menu from the Start menu (Windows key or click on the icon at the bottom left):

In the Control Panel click on 'Change Theme'.

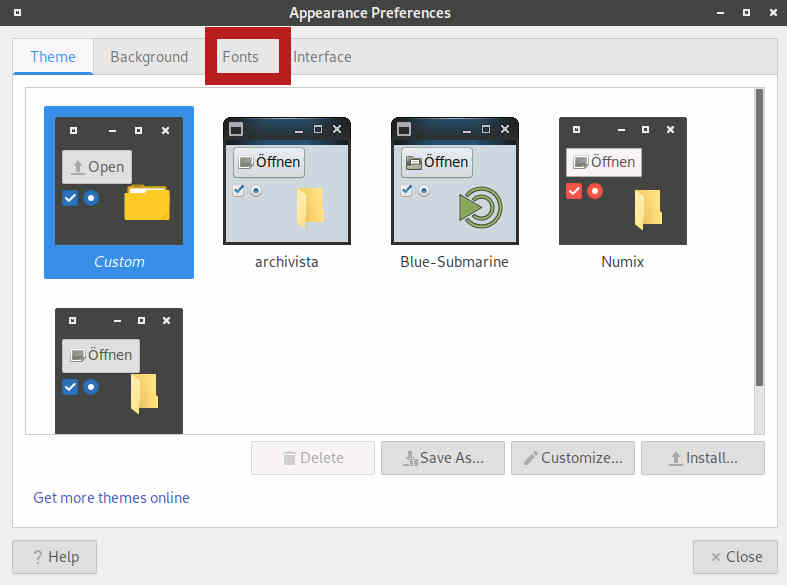
Now click on 'Fonts'.

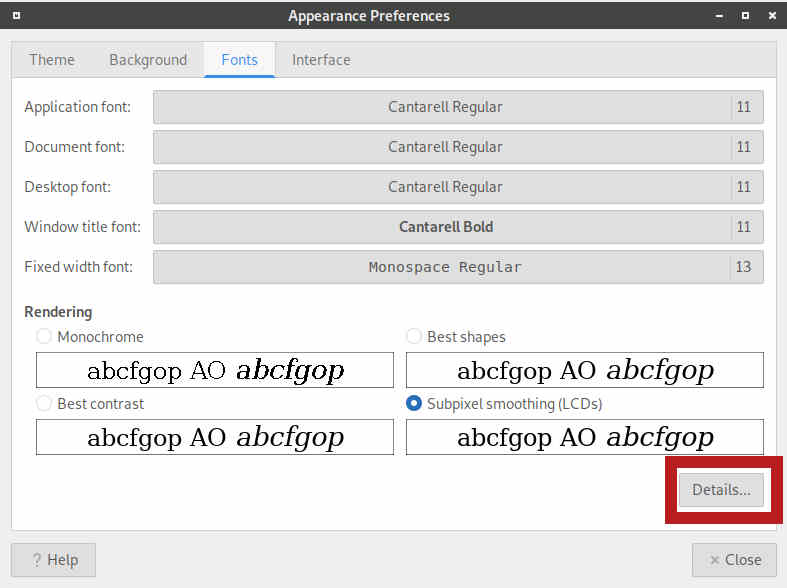
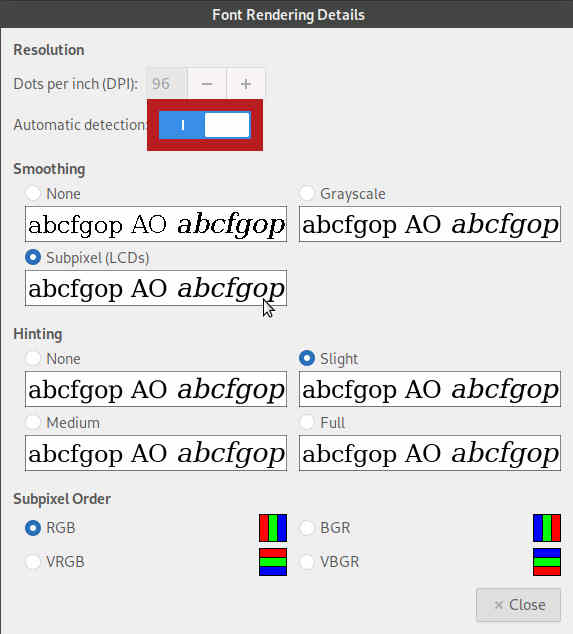
Now click on 'Details'. You will find the following form:

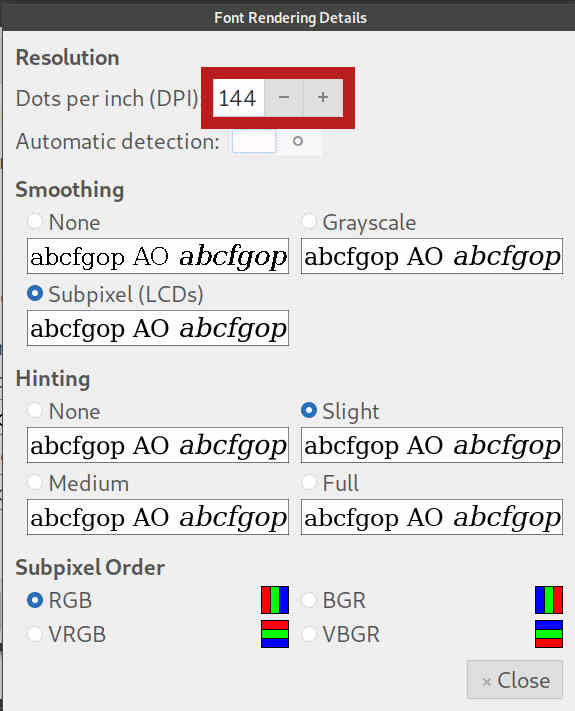
Decativate the default setting and enter a different resolution:

The default value is '96' (dpi = dots per inch). Common values for enlargement are '120', '144' or '192'. This gives a clean percentage enlargement (111 would not).
 To preserve the change, the desktop settings must be saved. To do this, call up the ArchivistaBox menu in the Start menu (Windows key or click on the icon at the bottom left with the mouse) and select 'Settings'. Then select 'Save desktop'.