Virtualisation with ArchivistaMini tutorial
Egg, Switzerland, 3 October 2016: The following blog entry provides a general introduction to the world of virtualisation with the ArchivistaMini 2016/X. It shows what virtualisation is, what types of virtualisation there are, what role ArchivistaMini plays and how ArchivistaMini is used and deployed. If you want to download ArchivistaMini right away, please click here.

Virtualisation
With virtualisation, several computers (guests) can be managed and operated via a single computer (host or main computer) thanks to the use of certain software (several boxes in one box). The guests do not have their own physical hardware in such cases, but instead use a sort of mock hardware. This is nevertheless so good that the guest computers or the operating systems and applications running on it do not see through the ‘magic trick’ and do not thus refuse the work.
Virtualisation can be used on practically any operating system. There are several concepts in this context. An entire computer (guest) can even be virtualised with the support of the hardware (CPU) (examples: KVM, VMware ESXi, Microsoft Hypervisor). It is only possible to virtualise guests that are compatible with the same CPU (a mobile OS with ARM, for example, does not work with an Intel/AMD CPU), so execution speed is very good.
The second type of virtualisation involves the guest being virtualised without help from the CPU (example: QEMU). This has the advantage that arbitrary computers can run on any hardware, but the disadvantage is lower execution speed.
In the third variant, guests are merely established using software; mention is often made here of containers (e.g. LXC). The advantage with this type of virtualisation is that very low resources are required, but this is achieved by the fact that the container guests are not actually isolated from the main computer and that subsequent updates between the computer for the virtualisation and the guests always have to be run synchronously, i.e. the guests cannot each be run with different operating systems.
Virtualisation can basically be carried out on any operating system. However, open source and/or Linux offer a decisive advantage because the operating system can be configured exactly as is required for the virtualisation. This is not possible or is only possible to a very limited extent in the case of the big name VMware and also Hypervisor in the Windows world.
KVM and QEMU with ArchivistaMini
As already mentioned, ArchivistaMini realises virtualisation with KVM, and here it must be added that KVM and QEMU have been delivered in a package for several years. As KVM operates much faster than QEMU, guests are usually operated with KVM; QEMU helps if guests that do not even run on the existing hardware are to be used. This is particularly advantageous if operating systems from bygone times (for example, Windows95 or Linux with the kernel 2.4.x) are to be started.
QEMU and KVM can now be installed on practically any computer (even with Windows). At first glance, a separate distribution such as ArchivistaMini does not appear to be necessary for virtualisation. It is/was sufficient to simply access any operating system (e.g. Debian), install the system and then deploy the virtualisation software.
But this is in fact not a particularly trivial task. For example, with the installation of Debian, it takes at least 20 to 30 minutes to get the basic system installed. Even if Linux can still be installed without a graphical interface, the installed instances are anything but small. Of course, one or two GB is no problem with today’s on-board equipment, but it isn’t exactly elegant. And also with the subsequent installation of qemu, one wonders why a further 200 MB of software is necessary with ‘apt-get install qemu’:
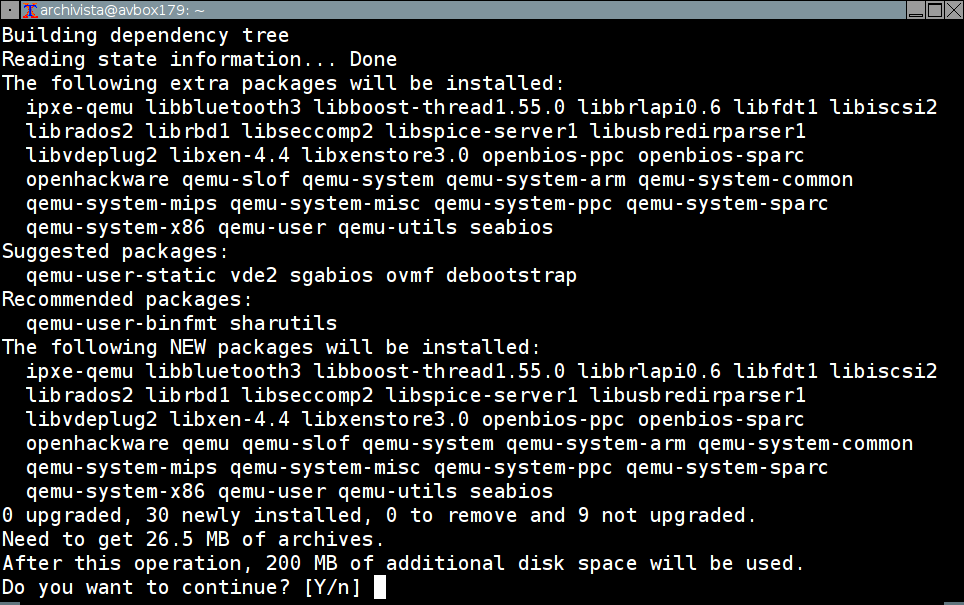
Why, for example, libxenstore3.0 and other candidates have to be installed remains incomprehensible. It is not XEN that is to be used, but KVM. However, even if qemu is installed, and guests can be set up, initiating KVM is started on the console with numerous parameters – here an example:
/usr/bin/kvm -monitor unix:/var/run/qemu-server/101.mon,server,nowait -monitor telnet:127.0.0.1:1,server,nowait -display vnc=127.0.0.1:-5900,password -pidfile /var/run/qemu-server/101.pid -daemonize -usbdevice tablet -name test -smp sockets=1,cores=1 -boot c -vga cirrus -tdf -enable-kvm -k de-ch -drive file=/var/lib/vz/images/101/vm-101-disk-1.raw,if=ide,index=0,cache=writeback -drive file=/var/lib/vz/template/iso/avtest1.iso,if=ide,index=2,media=cdrom,cache=writeback -m 2048 -net tap,vlan=0,ifname=vmtab101i0,script=/var/lib/qemu-server/bridge-vlan0 -net nic,vlan=0,model=rtl8139,macaddr=EA:BF:94:E3:52:79
This instance is now admittedly started, but additional packages are necessary in order to access the guests. A complete X-server as well as VNC are required in order to display a guest’s screen. The installation of the X-server and VNC is not at all easy, and takes a lot of time. Even professionals need half a day or more in order to carry out a manual installation.
ArchivistaMini = 90 MB and just a few minutes
There are now some graphical (web-based) consoles (GUIs) for KVM and QEMU, which simplify the compilation of an instance, but most of these are not available for general use, as a licence fee is payable for almost all the GUIs. Proxmox is a praiseworthy exception, but the focus of Proxmox is now much more on data centre solutions than on a simple virtualisation solution. With regard to this, the comments about the announcement of Proxmox 4.2 at prolinux.de are of interest. Original quote in reply to a question regarding why it is not possible to install Proxmox with the graphical installer on an existing hard disk without destroying it: “I always make a Debian installation first and then put Proxmox on top of that.” This was then followed by a discussion of about 20 posts in which, for example, there were questions about raid levels and partitioning the basic system. So not exactly straightforward.
ArchivistaMini was forked from Proxmox in 2009 for exactly these reasons, an update using ‘apt-get update’, ‘apt-get upgrade’ or ‘apt-get dist-upgrade’ is and will remain too complex on the console for lay people. The result that has arisen over the years is ArchivistaMini, a mini server for server virtualisation. With currently 90 MB for the entire operating system (Debian), KVM/QEMU, the necessary web server Apache for managing the consoles and numerous tools, ArchivistaMini is considerably smaller than other virtualisation solutions.
In contrast to other solutions, ArchivistaMini is not actually installed, but is just uploaded to the main memory (RAM mode). If ArchivistaMini finds a blank hard drive when it is started, it will be set up; if it is already set up, it will of course not be ‘touched’. The entire process takes no time at all, and the RAM requirement for the installed distribution is less than 300 MB.
New developments in ArchivistaMini 2016/X
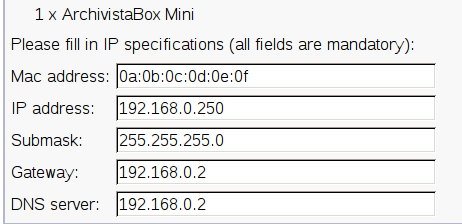
Each installation of ArchivistaMini was until now created in a web-based approach via shop.archivista.ch. It was possible to enter the desired Mac addresses for the network card and the IP parameters for one or two computers in a web form so that ready-made ISO files could be created and retrieved.
Even though the download was completely free of charge, the registration required via the shop sometimes discouraged people from carrying out the download. The installation can now also be carried out without the detour via the webshop. The variant via the webshop is still available, the installation of a cluster, for example, cannot be realised more easily than with the web-based approach. Back to ‘manual installation’.
Starting ArchivistaMini (installation)
The ISO file can be obtained from https://archivista.ch/avmini.iso. For initial tests, ArchivistaMini is usually mostly virtualised itself. For this, the ISO file is simply started, otherwise the ISO file would have to be burned onto a disk or a bootable USB stick would have to be created (more on this here). Although this guide contains Windows screenshots, UNetbootin is also available on Linux, Windows and Mac. Alternatively, the ISO file can also be started over the network (PXE). When the ISO is started, the IP parameters must be set on the first screen. An example in the most minimal variant:
ram ip.192.168.0.254
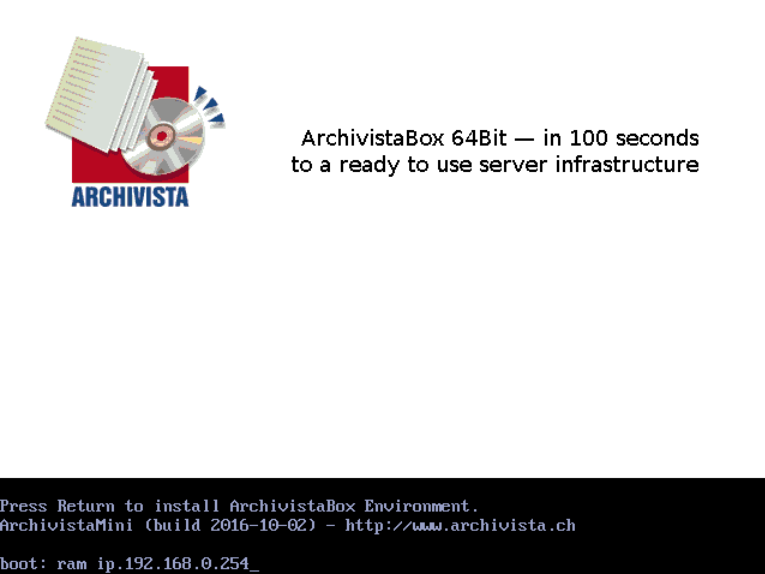
This configuration installs ArchivistaMini with a net mask 255.255.255.0, the gateway 192.168.0.1 and DNS 192.168.0.1. Other configurations can of course be entered as required:
ram ip.192.168.1.251 submask.255.255.255.0 gw.192.168.1.1 dns.192.168.1.1
The installation is started by pressing the Enter key. The server is ready to work on after 40 to 50 seconds. If ArchivistaMini finds an empty hard disk, this is formatted. To suppress the accessing of hard disks, the ‘ramonly’ option can also be entered, and ArchivistaMini will then run completely in the main memory. The option ‘de’ is specified if the German language is required in ArchivistaMini.
Note: If the above options are not entered, ArchivistaMini starts automatically after 10 seconds – without IP parameters the network has to be configured manually. This is not recommended. If the 10 seconds elapse during the first startup, Ctrl+Alt+Del can be used to force a restart, in order to be able to enter the IP parameters as above.
The following screen appears at the end of the process:
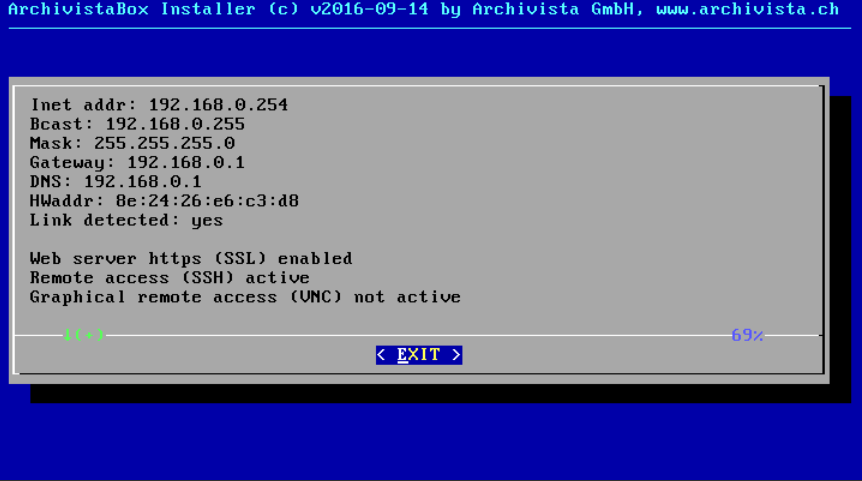
In order to administer guests, the ArchivistaMini server can be accessed online using the IP address https://192.168.0.254:
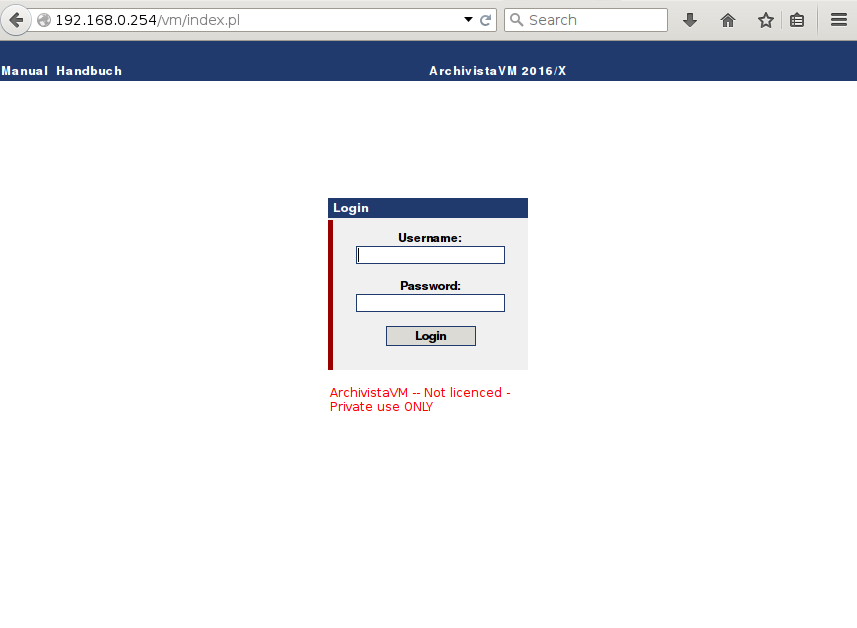
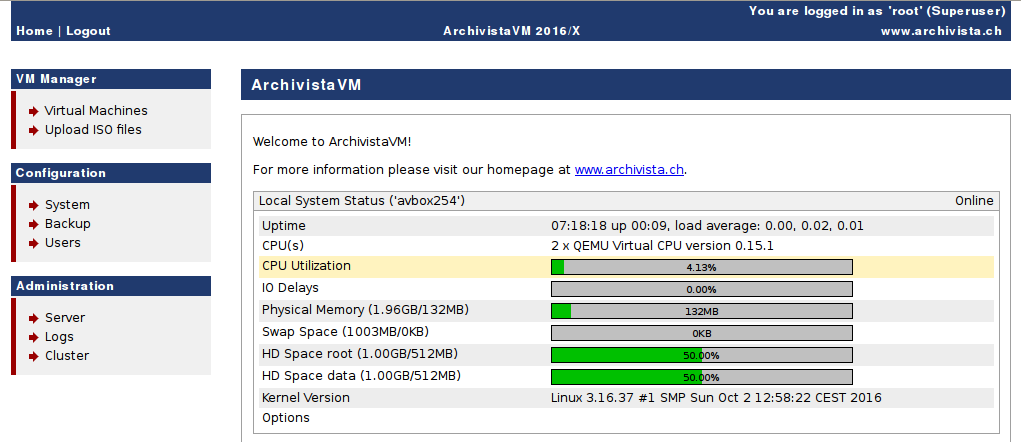
Logging in is done by entering the user ‘root’ and the password ‘archivista’, and the following interface will then appear:
Setting up a guest with ArchivistaMini
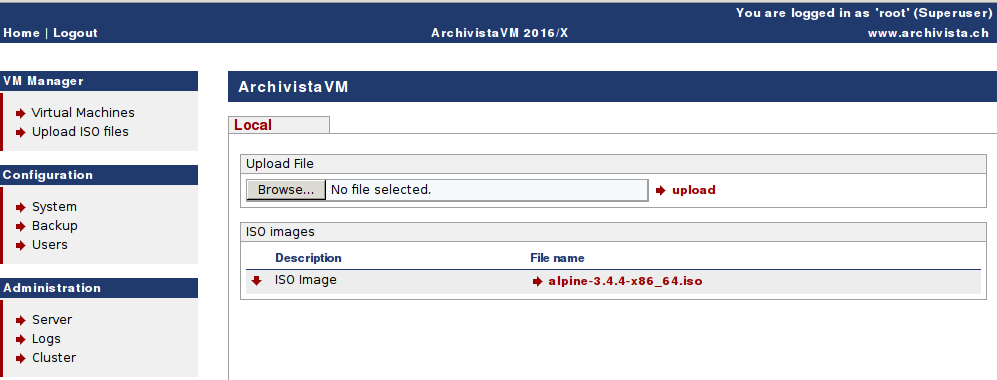
An installation medium (ISO file) is required in order to set up a first virtual guest. This is shown here using Alpine-Linux as an example. Please obtain the ISO file from alpinelinux.org for this. This currently bears the name alpine-3.4.4-x86_64.iso. ‘Upload ISO files’ can be used to upload this file to the ArchivitsaMini server:
The virtual guest (in this case AlpineLinux) can now be set up. For this, select ‘Virtual Machines’ and then ‘Create’:
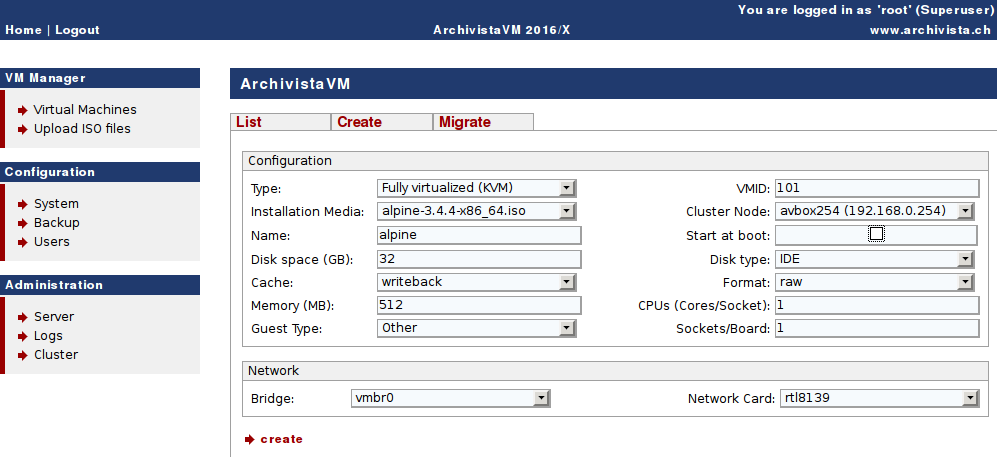
At ‘Installation Media’, all the available ISO files are displayed (in this case alpine-3.4.4-x86_64.iso). A name (‘alpinelinux’ in this case) must also be entered. The other parameters, such as main memory, number of CPU cores and the size of the hard disks can also be adjusted. However, the 512 MB are sufficient for this example. The virtual computer is opened via ‘create’:
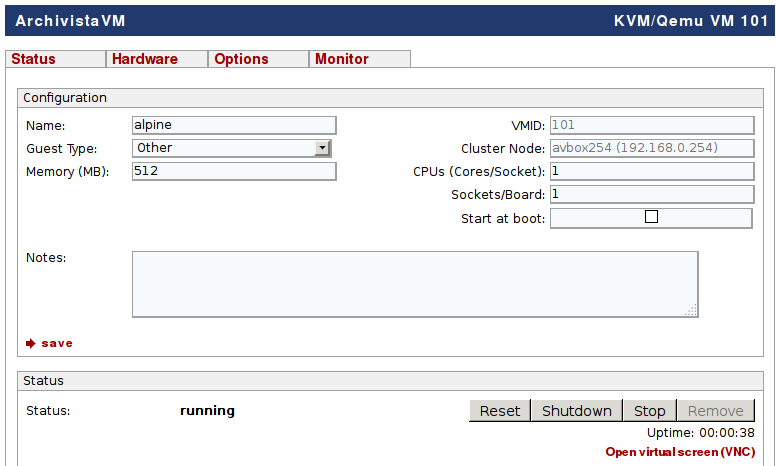
To start the virtual guest, click the ‘Start’ button. After this, the screen of the virtual machine can be opened with ‘Open virtual screen (VNC)’:
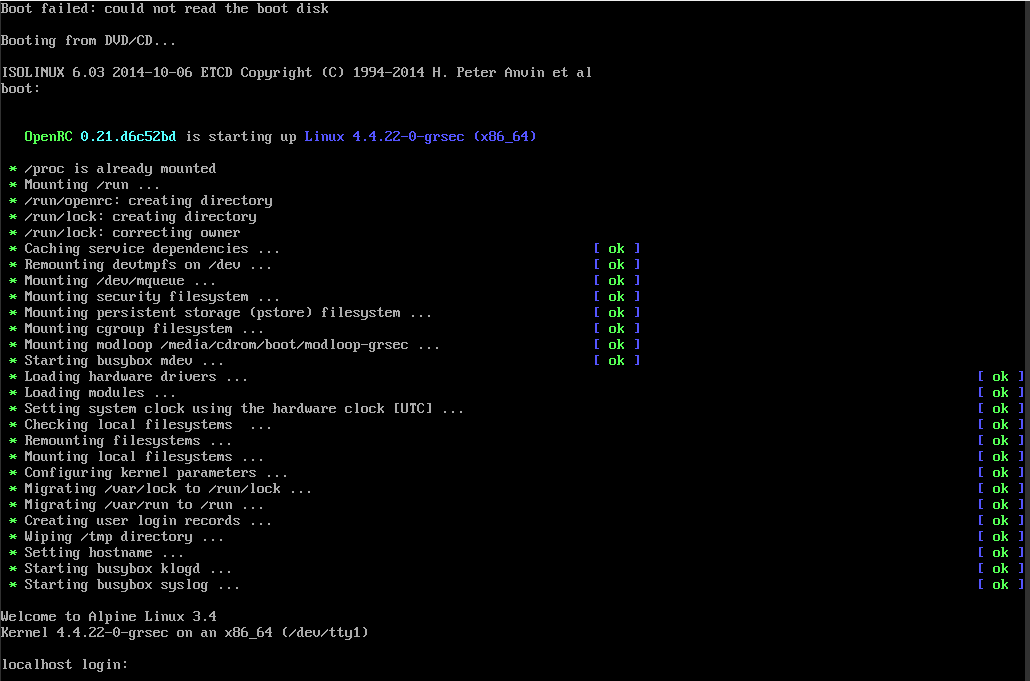
Regarding installation of the guest (in this case AlpineLinux), the guest’s documentation must be consulted.
Administering guests on the console with ArchivistaMini
Guests can be managed with ArchivistaMini not only with the graphical web interface but also on the console. There are two possibilities in this regard. Either the ‘EXIT’ button is pressed on the start screen of ArchivistaMini, in order to work locally with the console, or access is achieved with ssh (in this case ‘ssh 192.168.0.254’). The most important commands, all of which can be queried with ‘qm info’, are listed below:
root@avbox254:~#
qm info qm <command> <vmid> [OPTIONS]
qm [create|set] <vmid>
–memory <MBYTES> memory in MB (64 – 8192)
–smp <N> set number of CPUs (Cores) to <N>
–sockets <N> set number of Sockets/Board to <N>
–ostype NAME specify OS type
–onboot [yes|no] start at boot
–keyboard XX set vnc keyboard layout
–cpuunits <num> CPU weight for a VM
–name <text> set a name for the VM
–description <text> set VM description
–boot [a|c|d|n] specify boot order
–bootdisk <disk> enable booting from <disk>
–acpi (yes|no) enable/disable ACPI
–kvm (yes|no) enable/disable KVM
–tdf (yes|no) enable/disable time drift fix
–localtime (yes|no) set the RTC to local time
–vga (gd5446|vesa) specify VGA type
–vlan[0-9u] MODEL=XX:XX:XX:XX:XX:XX[,MODEL=YY:YY:YY:YY:YY:YY]
–ide<N> [file=]file,][,media=d]
[,cyls=c,heads=h,secs=s[,trans=t]]
[,snapshot=on|off][,cache=on|off][,format=f]
–ide<N> <GBYTES> create new disk
–format <format> qcow|raw => type of disk format
–cache <cache> writeback|writethrough|none
–ide<N> delete delete disk
–cdrom <file> is an alias for –ide2 <file>,media=cdrom
–scsi<N> [file=]file,][,media=d]
[,cyls=c,heads=h,secs=s[,trans=t]]
[,snapshot=on|off][,cache=on|off][,format=f]
–scsi<N> <GBYTES> create new disk
–scsi<N> delete delete disk
–virtio<N> [file=]file,][,media=d]
[,cyls=c,heads=h,secs=s[,trans=t]]
[,snapshot=on|off][,cache=on|off][,format=f]
–virtio<N> <GBYTES> create new disk
–virtio<N> delete delete disk
qm monitor <vmid> connect to vm control monitor
qm start <vmid> start vm
qm shutdown <vmid> gracefully stop vm (send poweroff)
qm wait <vmid> [time] wait until vm is stopped
qm stop <vmid> kill vm (immediate stop)
qm reset <vmid> reset vm (stop, start)
qm suspend <vmid> suspend vm
qm resume <vmid> resume vm
qm cad <vmid> sendkey ctrl-alt-delete
qm destroy <vmid> destroy vm (delete all files)
qm status <vmid> shows the container status
qm cdrom <vmid> [] <path> set cdrom path. <device is ide2 by default>
qm cdrom <vmid> [] eject eject cdrom
qm unlink <vmid> <file> delete unused disk images
qm vncproxy <vmid> <ticket> open vnc proxy
qm vnc <vmid> start (X11) vncviewer (experimental)
qm showcmd <vmid> show command line (debug info)
qm list list all virtual machines
qm startall start all virtual machines (when onboot=1)
qm stopall [timeout] stop all virtual machines (default timeout is 3 minutes)
Working with the console is of course voluntary, as all the commands can also be realised via the web interface. The most important console commands are shown briefly here using the instance 101 of AlpineLinux that has been created as an example. A guest is started with qm start 101, and abruptly stopped with qm stop 101; qm list can be used to query the condition of all the guests:
      VMID NAME                 STATUS     MEM(MB)    BOOTDISK(GB) PID
       101 alpine               running    512               32.00 2486
In this case we only have the guest ‘alpine’, but if there were additional virtual guests these would be listed in a table. Finally, it should be noted here that the virtual guests are located at /var/lib/vz/images and the basic data about the guests is stored in a configuration file at /etc/qemu-server. The AlpineLinux guest in this example can be viewed using cat/etc/qemu-server/101.conf:
ide0: vm-101-disk.raw,cache=writeback
smp: 1
memory: 512
format: raw
ostype: other
sockets: 1
ide2: alpine-3.4.4-x86_64.iso,media=cdrom,cache=writeback
vlan0: rtl8139=4A:FF:30:BE:33:5D
bootdisk: ide0
name: alpine
cache: writeback
Compared to the native QEMU/KVM format, the ArchivistaMini format is very simple, the basic data about the guest is basically self-explanatory.
Defining parameter data permanently
ArchivistaMini runs completely in the main memory (RAM). If the computer is switched off, the IP parameters are thus ‘lost’, i.e. they have to be re-entered when ArchivistaMini is started. In order to store these permanently, the file ‘isolinux.cfg’ (at startup from ISO/CD) and/or ‘syslinux.cfg’ (USB stick/hard disk) within the ISO file can be supplemented with the previously entered parameters, in order to keep the process permanently available. An entry similar to the first start would look like this, for example (excerpt from isolinux.cfg):
label ram
kernel vmlinuz
APPEND initrd=initrd.img insmod progress loglevel=0 edd=off pci=nocrs auto ip.192.168.0.254 ramdisk_size=81920
The information in red is to be added to ‘isolinux.cfg’ or ‘syslinux.cfg’. It could certainly be said that adapting the ISO file is not easy for lay people, but for this case the above described free variant is expressly available at shop.archivista.ch/oscommunity/catalog/advanced_search_result.php?keywords=mini.
Note: Upon starting, ArchivistaMini can basically be configured as desired. Further information is available at /de/media/archivistavm-linuxday2012.pdf (only in German). A detailed description of ArchivistaMini (including the establishment of a DRBD cluster) is provided there. This is also recommended reading https://archivista.ch/cms/en/news/year-2011/archivistaram-amp-archivistausb. Although the blog entry is from 2011, it provides a very good description of the ArchivistaMini concept (even if it is under the name ArchivistaRAM or ArchivistaUSB).
Summary and outlook for ArchivistaMini
To conclude, it should be mentioned that there is detailed documentation about ArchivistaMini, the management of guests, data backup and much more besides at https://archivista.ch/cgi-bin/riehb/search.pl?query=archivistavm. With all this information on board, nothing else should stand in the way of using ArchivistaMini.
ArchivistaMini has existed in this form for many years. In contrast to other solutions, ArchivistaMini does not claim to be a data centre solution, which is why it is considerably more straightforward and slim. In order to achieve this, the components used by ArchivistaMini, such as Debian Jessie, Apache and QEMU/KVM, are gathered together in a single package, and the ArchivistaMini RAM mode offers great comfort during installation and daily work. Thus, for example, a new version can be realised at any time by swapping the ISO file.
Regarding the further development of ArchivistaMini, the aim will not be to implement as many new features as possible in the shortest possible time. Instead, it will involve making the existing solution even slimmer and easier to use without breaking the compatibility with previous versions. This aim has been pursued by ArchivistaMini since 2009. During this time, the solution has ‘shrunk’ from almost 700 MB at the beginning to less than 90 MB. This may seem like almost petty amounts in a time when everyone handles gigabytes and terabytes, but this is not the case.
While other solutions require the first few gigabytes for the system partition, ArchivistaMini requires only 300 MB of main memory to store the entire system in a RAM disk. Discussions about the best raid level for the installation of the solution, as are conducted on prolinux.de, have therefore been consigned to the past in this context. Just insert a USB stick or CD and away it goes.